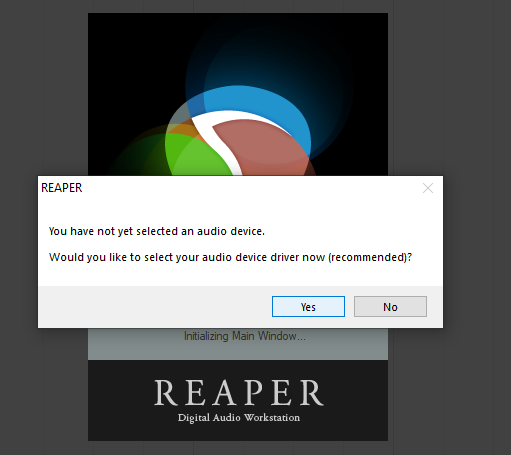
In Reaper, your audio configuration options are in the Options menu and will also be prompted to configure upon initially loading.
All audio configration options can be located in Options > Preferences, select Device under Audio in the left panel.
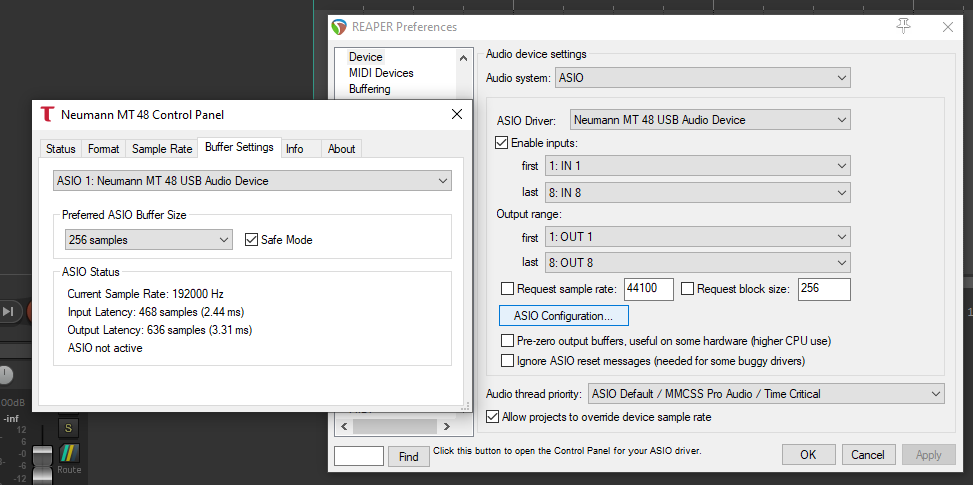
For Audio system, select ASIO.
In the ASIO Driver dropdown, select the Neumann MT 48 USB Audio Device.
Underneath, you can select the Input and Output ranges you will be physically enabling.
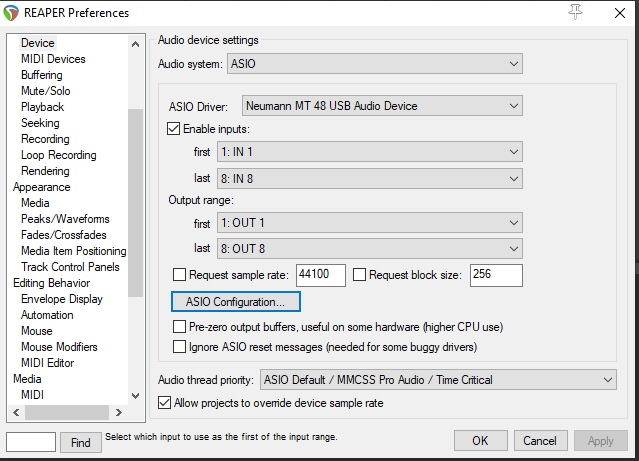
With any changes, click Apply.
Above Device, select Audio in the panel on the left.
Under Channel naming/mapping, enable both the Input Channel Name Aliasing/Remapping and Output Channel Name Aliasing/Remapping options, then click Edit Names/Map (one at a time) to rename your inputs and outputs accordingly.
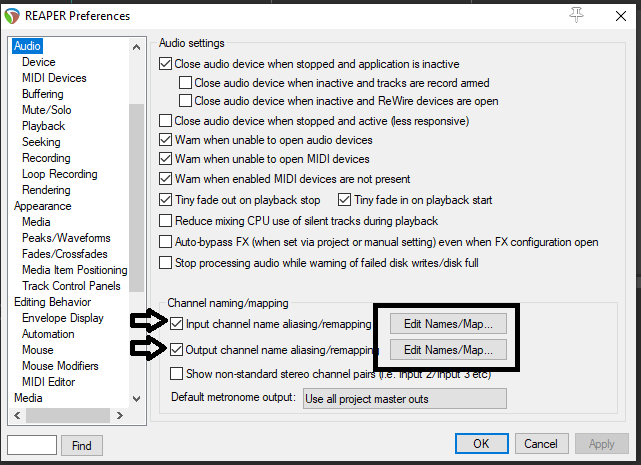
Enabling this allows you to rename each input and output accordingly, and save them for future use.
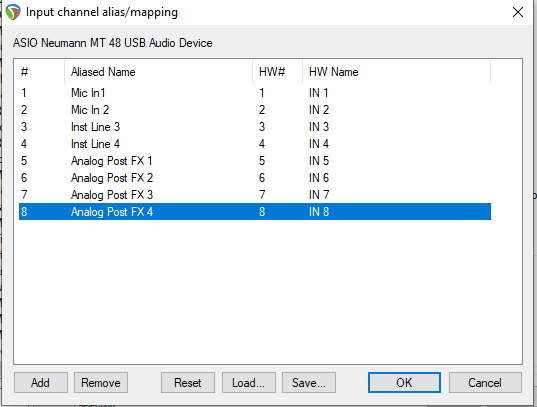
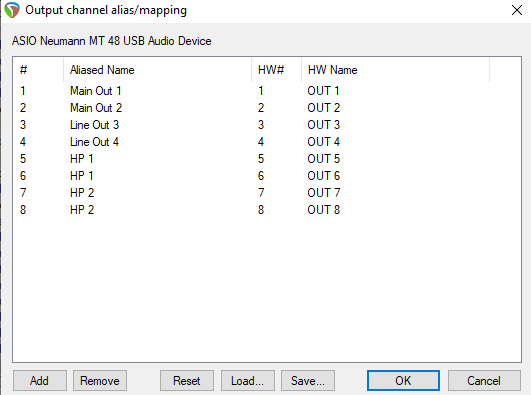
Click Save to save each mapping for future use, then click OK.
Once you have the appropriate inputs and outputs showing and are renamed as desired, you can begin recording.
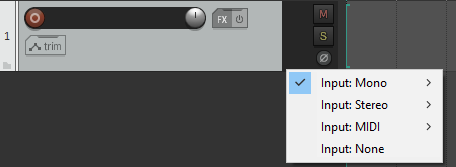
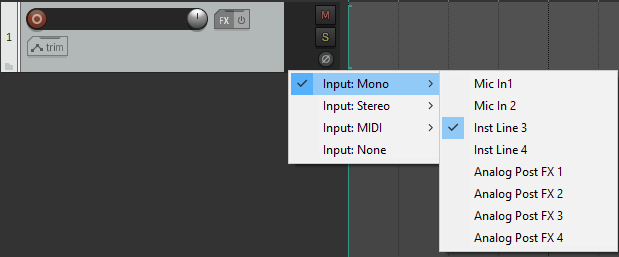
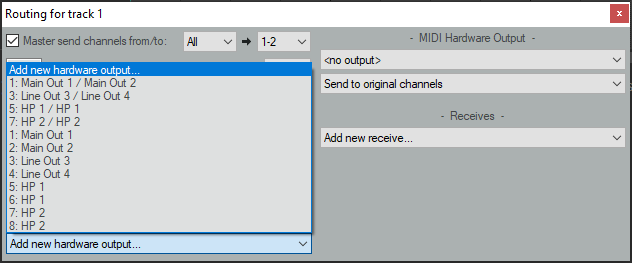
On a track, navigate to the I/O settings. The input will be the input your source is coming in from on the MT 48 (Mic 1, Mic 2, Line 3-4, etc.)
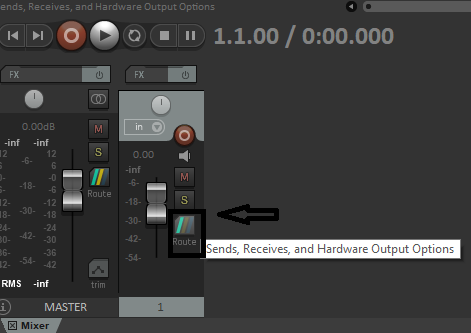
The Output will be configured using the Route button, which you can then route the track to play back through hardware outputs on your MT48.
Additional tips:
If you incur latency while recording, this can be adjusted by hitting the ASIO Configuration in the Options > Preference > Devices menu, which opens the Neumann MT 48 Control Panel. The Preferred ASIO Buffer Size (increasing or decreasing) will impact latency.
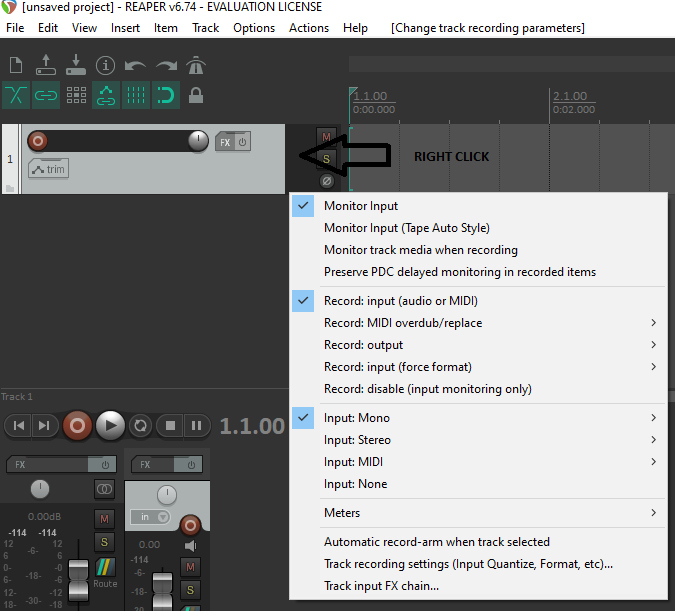
When recording, you can disable input monitoring through the software and instead monitor directly through the MT48 for low latency. Turn off the Monitor Input option by right clicking in the track pane and unchecking the first option.
Prior to recording, you will need to check your input level coming in to the interface. You do this through the MT48's Preamp module for the appropriate input selected. If you are recording more than one source at the same time, you will need to do this for each input. See "Setting Up a Track to Record" in the Tutorials guide.