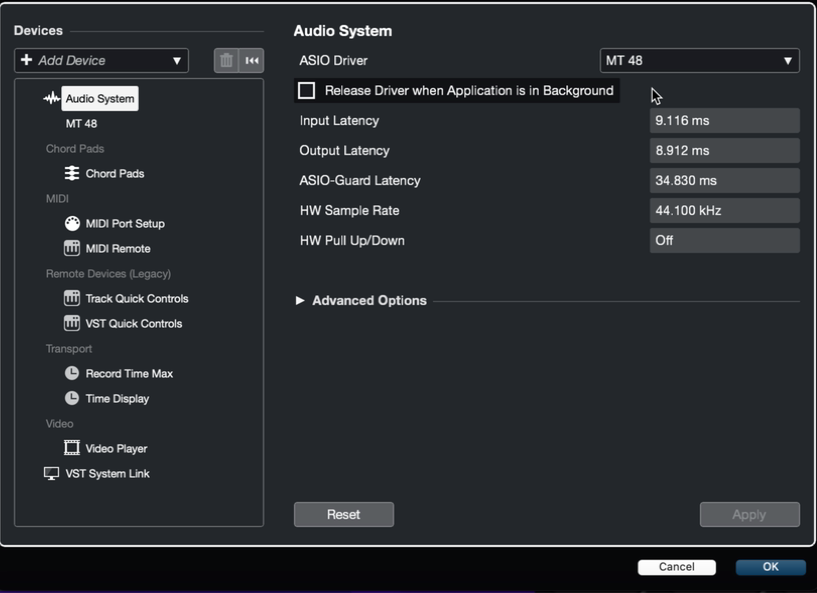
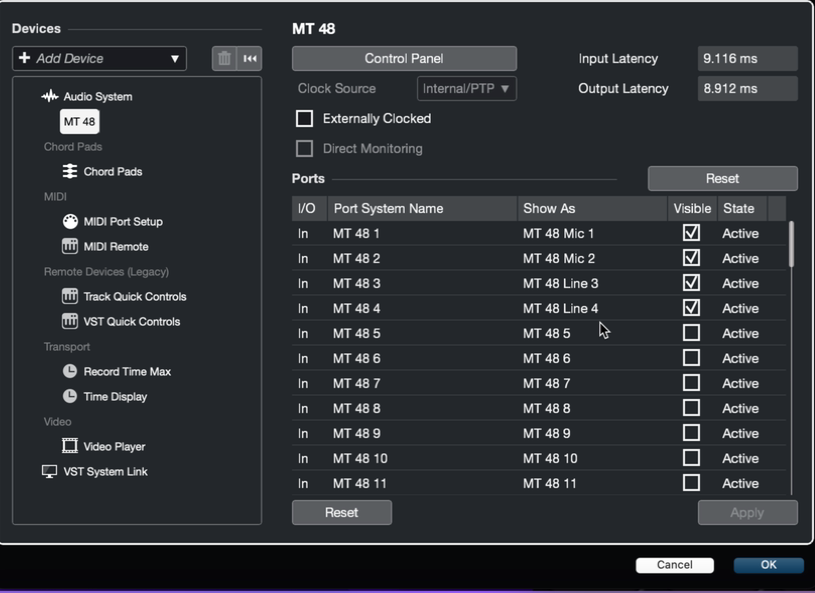
Below Audio System in the Devices column, select the MT 48.
This is where you can enable or disable any input and output options as you see fit (using the Visible check boxes). You can also adjust the Show As names here.
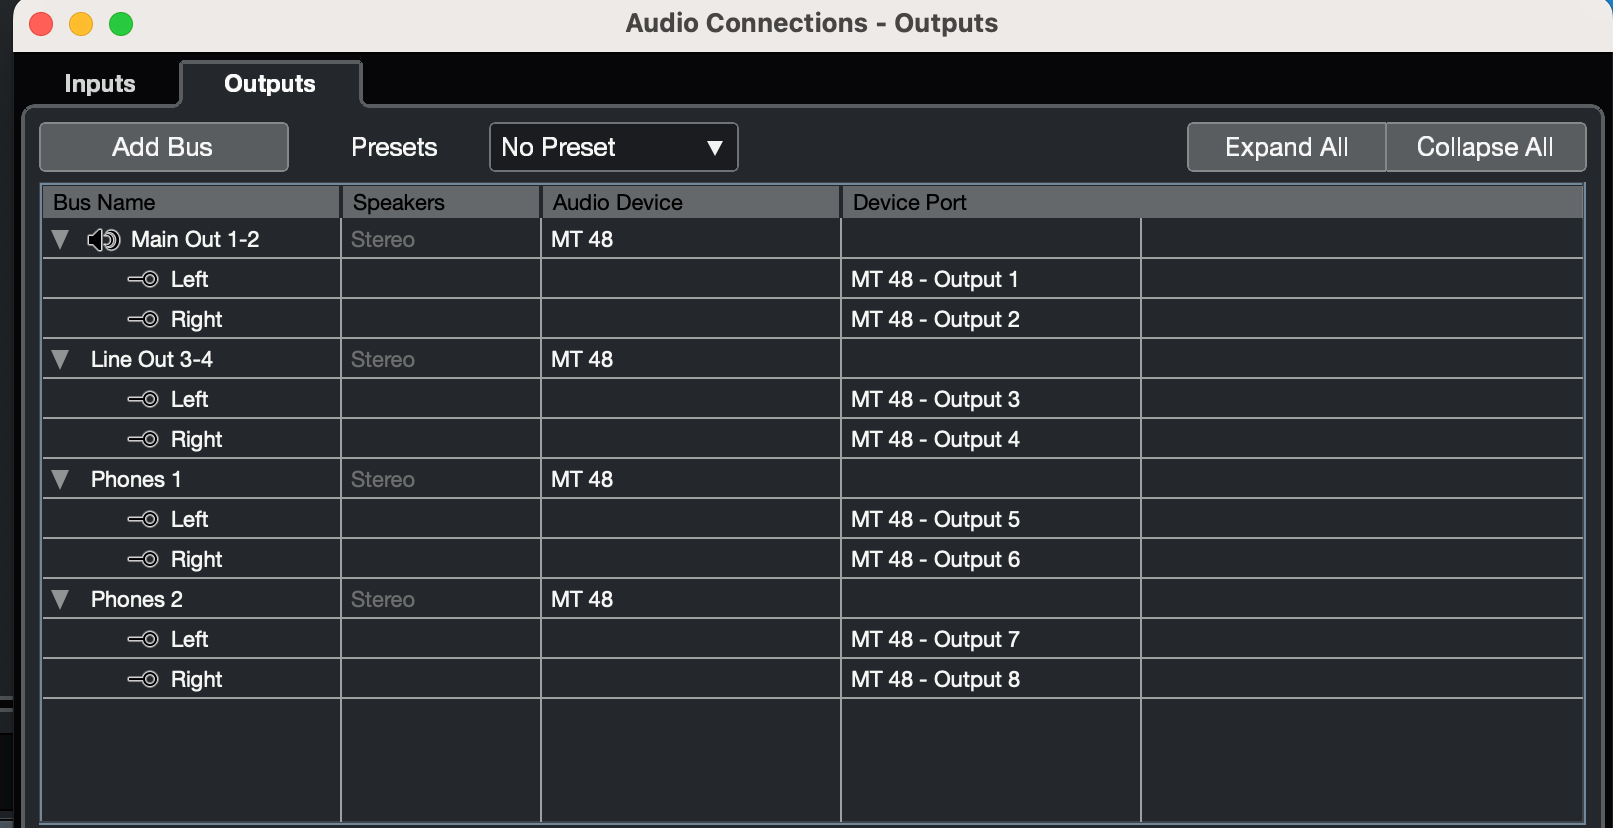
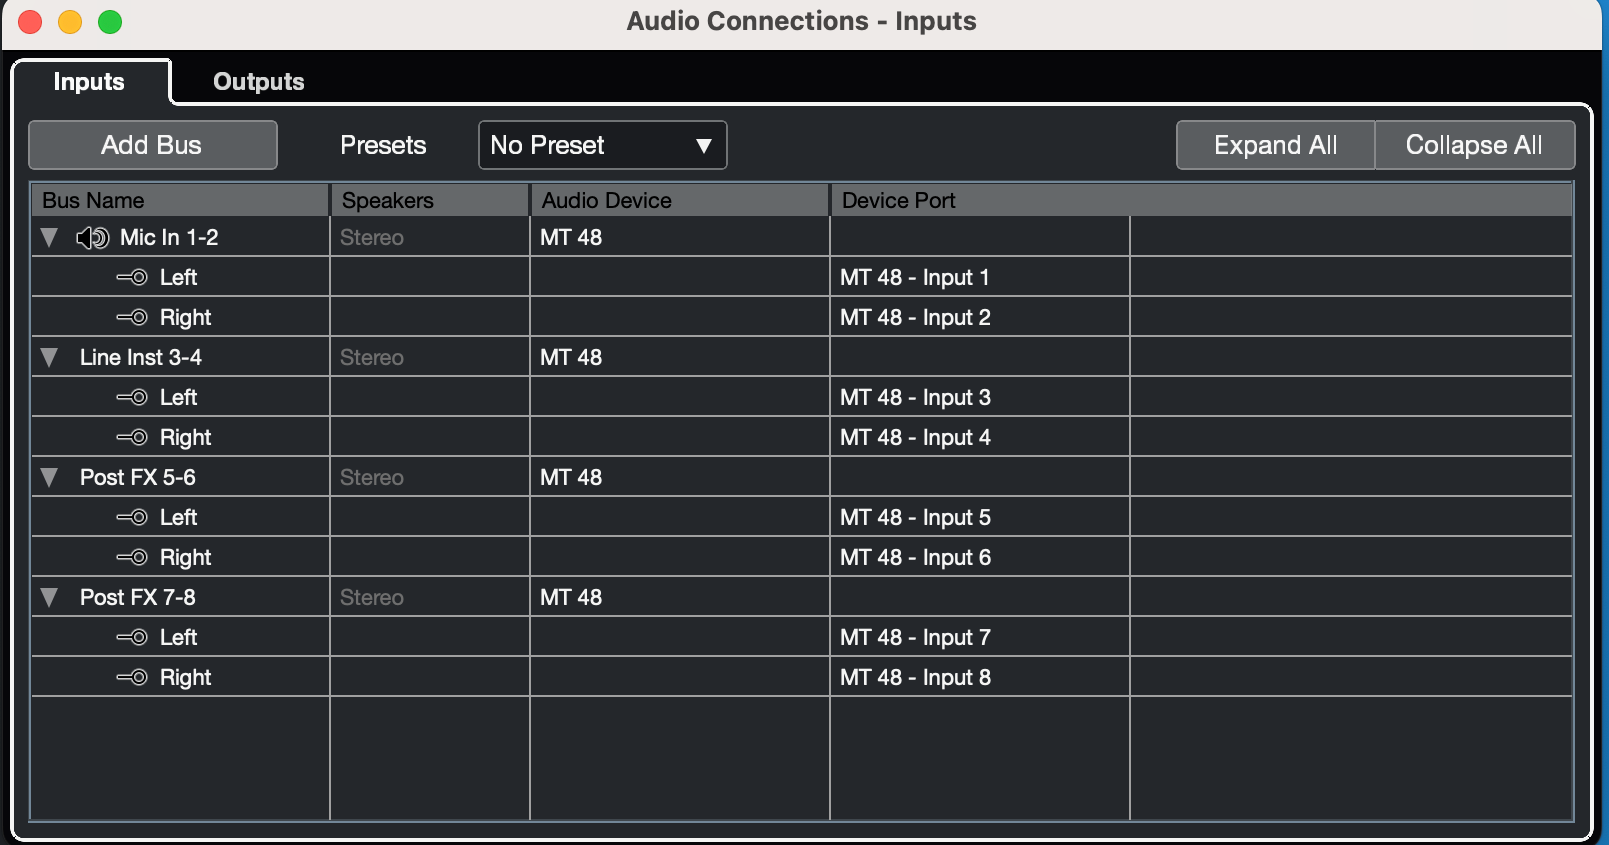
Now, go to Studio > Audio Connections. This shows your active input and output connections currently set.
You can create a bus [Add Bus] for each stereo output pair you have enabled, and label them under the Bus Name column.
On the Inputs tab, it is recommended to set up input channels as stereo busses.
Doing so will allow you to record as a stereo pair, or individual mono channel.
Name these accordingly under Bus Name (eg Mic In 1-2, Line Inst 3-4)
Once you have the appropriate inputs and outputs enabled and renamed as desired, you can proceed.
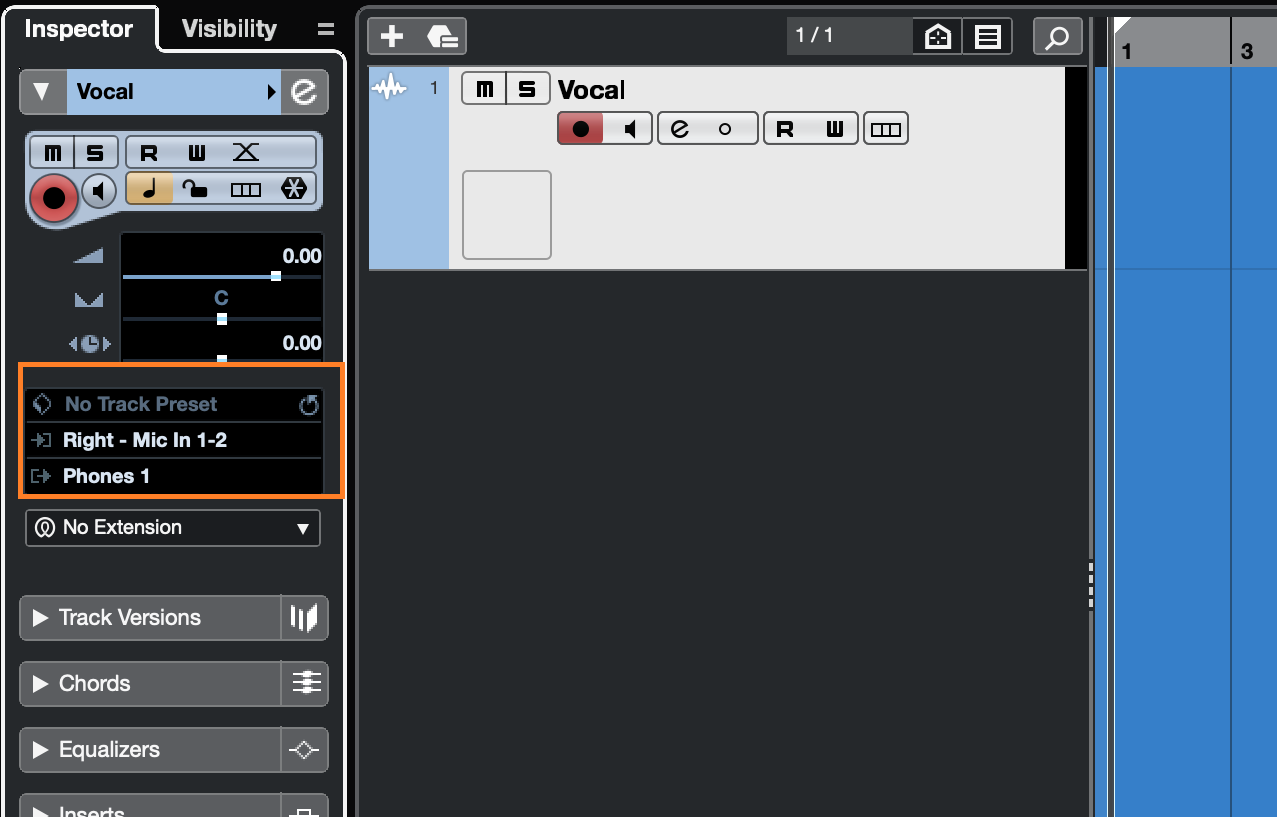
On a track, navigate to its I/O settings. With your track selected, you will find these within the track's inspector module on the left. The input will be the input your source is coming in from on the MT 48.
As the inputs are grouped into stereo pairs, you will see Left and Right options. Left is the odd-numbered input (1,3, etc) and Right is the even-numbered input (2,4, etc) of the pair; stereo would be left and right channels combined.

The Output will by default go to one your busses in the Audio Connections section. You can change this as you see fit.
Prior to recording, you will need to check your input level coming in to the interface. You do this through the MT 48's Preamp module for the appropriate input selected. If you are recording more than one source at the same time, you will need to do this for each input. See "Setting Up a Track to Record" in the Tutorials guide.